Wednesday, March 30, 2011

Today's Top Twenty

Wow!  It has been a week of honors for Jane of All Trades.  I was featured on Today's Top Twenty.  Amanda found my party hat tutorial and featured it on her site.

Today's Top 20


Thank you, Amanda!  I'm really excited to be a part of your site (when I typed that, I accidentally wrote "party" instead of "part" - kind of fitting, though, don't you think?).

Hope something surprises you in a good way today!

Monday, March 28, 2011

Party Tutorial Contest

What fun!  Somebody found my party hats tutorial and asked me to join a contest over at her blog.
Here's the link - there are some adorable tutorials and ideas over at Pure Joy Events.

Pure Joy Events Party Tutorial Contest

I'm really honored to have been asked, so thank you!

Tuesday, March 22, 2011

Tee Hee

Don't these make you giggle?


I saw an iron-on applique at the store the other day that gave me the idea (then I saw a blog post after I made my first two - something in the air?)


These two long sleeved ones are for two friends who are due with boys next month.  I found some great lined pants for fall, and the TINIEST O-Ball ever to go with the shirts.


I hope the moms-to-be get a chuckle out of these, too! 
  

Here's to something bringing a suprise smile to your face today! 

Tuesday, March 15, 2011

Lonely ol' bits

There is something about taking lonely, broken bits of crayon, and turning them into something new and vibrant.
Back in December, I made a bunch to sell at a local crafty open house.  They were a huge hit.  See the project here.

Recently, with St. Patrick's Day on the brain, I was inspired to dig out the lonely ol' bits and try rainbow crayons along the lines of these and these (both courtesy of One Pretty Thing). 

Here's how it went:

To my dismay, I couldn't find any cute St. Patrick's Day shaped molds for the crayons.  Plan B?  Festive-colored mini-cupcake papers.


Unlike last time, I chose to melt the crayons in the oven (250 degrees).  Each color is in a small aluminum baking cup.  This was SO much easier than melting each color individually in a double-boiler.  No at-home facial but much easier.


Halfway through the colors, I ran out of space in the cups!  So, now the plan is there will be one crayon for warm colors, one for cool colors.


Warm colors done.  I pretty much want to eat them even though I know they are crayon - they look too much like mini Reece's peanut butter cups!


Somehow, with EVERY color, I ran about 2 cups short.  Thank goodness for a big stash of lonely ol' bits.


Cool colors done.  There is something so calming about these colors together.

Quality control

New life for old bits!

Having done this project three different times and three different ways, I would definitely recommend melting the crayons in the oven (use old pans!), and I prefer the look and feel of the smoother crayons I made in the past.  Of course, the little one serving as quality control didn't seem to mind.  Can you see how serious she is about her "arting"?  Love that girl!

May you remember all the ways you are lucky this St. Patrick's Day!

Saturday, March 12, 2011

New life for an old shirt

From this...


to this...


courtesy of this, with a few modifications (1/2" wider, kicked out the sides for the skirt, lengthened by 4 1/2", used existing hem of shirt).

Like the headband?  Pop over here for the how-to.

Happy weekend!

Wednesday, March 2, 2011

Celebrate...with party hats!


While looking at a very girly princess hat the other day, it occurred to me that I could revamp the design to make a basic party hat.  Seeing as this is Celebrate the Boy month over at Made by Rae and Made, I thought this was the perfect way to get in the spirit!

So, dig out your favorite boy fabric and celebrate your little guy by making him a cute (and super-simple) party hat!

Here's how:

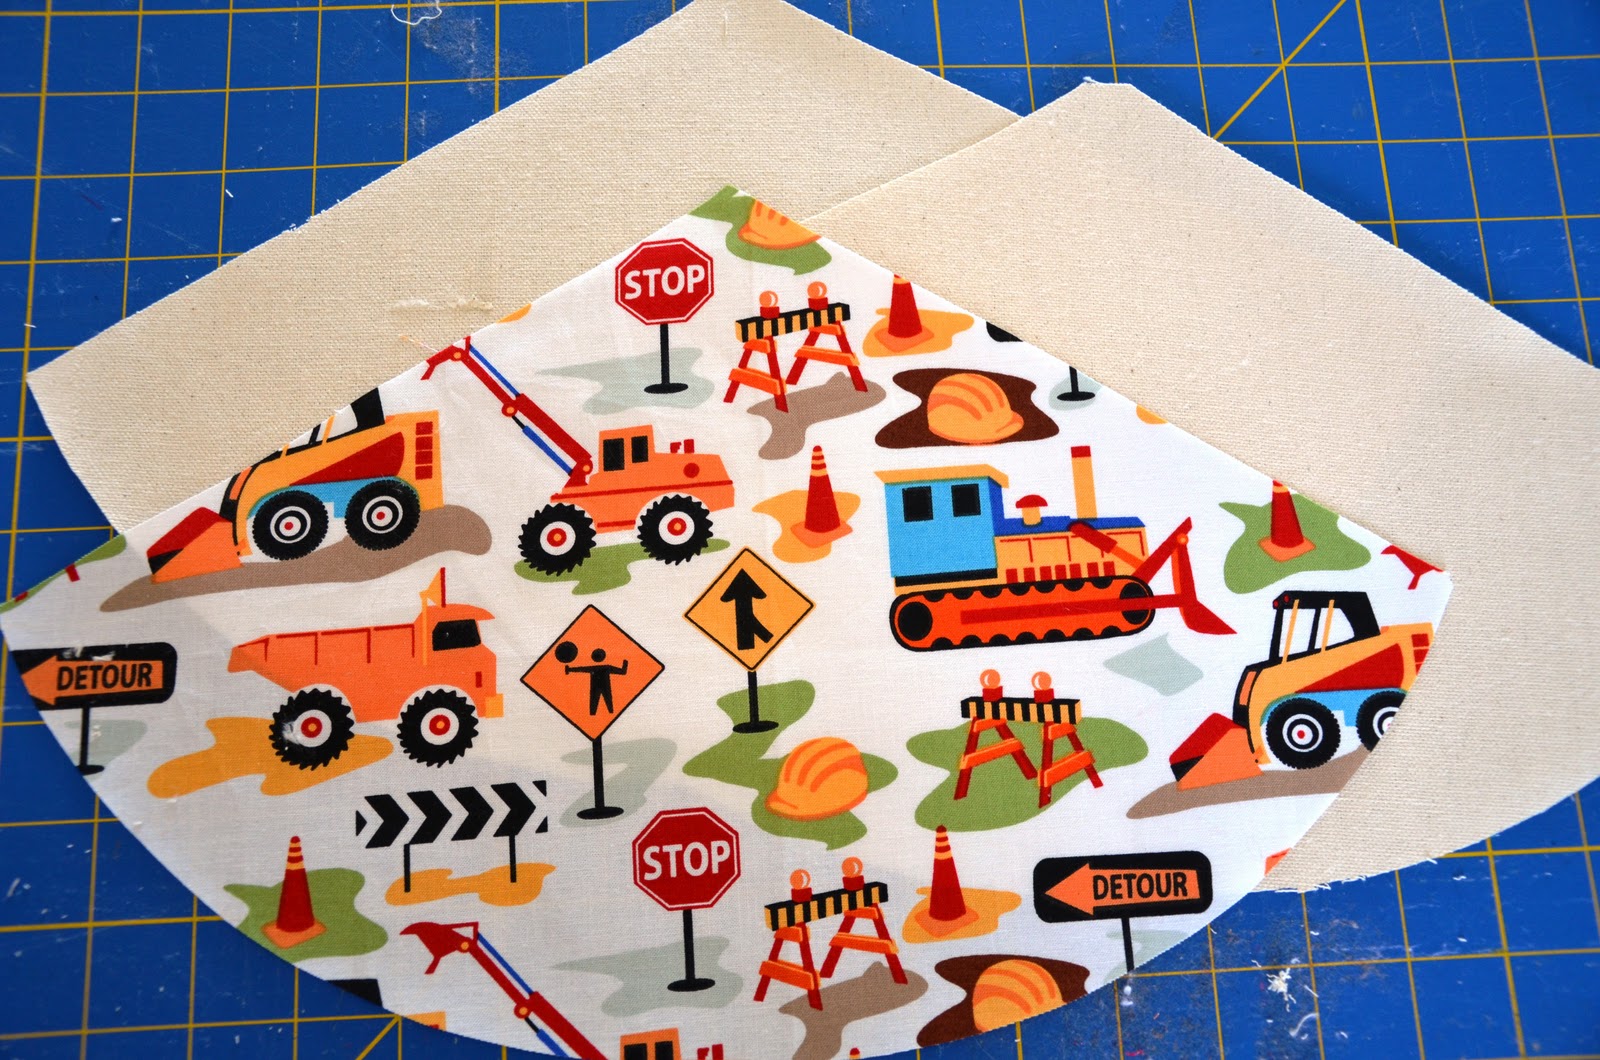
Materials: one 10" x 15" rectangle of outer fabric
                  two 10" x 15" rectangles of duck cloth for interior
                  one 11" piece of 1/8" elastic
                  one 18" piece of trim (rick-rack, pom-poms, etc.)

OR
                  
                  see HERE for an alternate way to line hat, including coordinating cute fabric


Step 1: Make a quick pattern - this hat is 9" long (from point to bottom) on both sides, and about 9" along the curved bottom.  So, the top angle is 60 degrees (hello, junior high math anyone?).
I'm trying my hand at including a pattern here (forgive my superior technical skills...ha ha) - the pattern is hand-drawn, and (I'm pretty sure) upside down.  Oh well - it will save you some math, right?

Step 2: Place one 9" side along the fold of your fabric.  Cut along the other 9" side and the curved bottom.  Repeat for both pieces of duck cloth.
Note: when you open the cut pieces of fabric, they will now be triangles with 9" straight sides, an 18" curved bottom, and a 120 degree angle at the top.


Step 3: Layer the fabric together.  Make sure the right side of your outer fabric is facing out.  I like using a temporary spray adhesive to hold the pieces together vs. pins - much quicker.


Step 4: Baste along the bottom curved edge.  I used about a 1/4" seam allowance.


Step 5: Serge (or zigzag or pink) along this edge.

Step 6: Sew down your elastic about 4 1/2 " in from each end of the bottom edge.  I zigzag and straight stitch over the elastic a few times to really secure it (do you think it looks secure?).


Step 7: Sew down your trim, covering up the elastic and serging.  Be sure to move the elastic out of the way so you don't sew it into your trim!  Trim that little bit of elastic sticking out.


Step 8: Fold the hat in half, right sides together, to match each 9" straight edge.  Sew this seam, being sure to backstitch at either end.  Serge (or otherwise finish) this seam.

Step 9: Turn the hat right side out, press and try on your little one. 


Have fun with all the fabric and trim combinations you can make!  I only had this green rick rack on hand when I made these three, but later that day, I raided the trim aisle at Joann's for lots more options.
I also think this would be such a fun project to make with muslin as the outer fabric.  Then, give the kids fabric markers, etc. and let them decorate their own!

Have fun!


LinkWithin

Related Posts Plugin for WordPress, Blogger...